After a lot of of changes and improvements. We now have a finished piece. We had changed a lot of things from our original concept and I think that the new video we made turned out better than expected.
The link shows our finished and proved piece. I am pleased with this work because our whole group had put a lot of handwork and effort in to make this. We used a lot of the research we did. I think that our primary research we did was more effective than the secondary data we collected. The primary data allowed us to do a lot of things with our movie to meet our audiences needs. Finding out what they found scary was good because the majority had the same reasons to watch a horror movie and what is expected from it. This enabled us to add all those features in. When we showed this back to the class they seemed to love it.
Even though we had to change our whole horror sequence I believe that the one we made the second time round turned out to be better than what we expected. With all of the members in the group skilled at each thing we tried to cover the micro features as well. I was in charge of the editing, Amy was covering Performance and Yaaseen was doing the camera work.
With the group I had I think we produced an amazing piece of work. This is because we used our Primary research to make this video. Everything that was ticked on our questionnaire was included in the movie. With a group with such amazing talents we all put in our best efforts to make this video.
Thursday, 27 March 2014

Monday, 24 March 2014
Evaluation
When creating this evaluation i wanted to be as creative as possible. This is because I wanted the blog to be interesting so that the audience will not get bored by reading it. To be on the creative side, i tried to include many videos and presentations.
In this presentation, i had to discuss what media types our group used to relate to the real media products. I then i went on to answer a question asking who our audience would be.
It was a good idea to use Prezi because it is different from a normal presentation. The turns and swirls in this presentation makes it look attractive and interesting for our audience when they read through it. We didnt answer many of the questions because we wanted a variety of ways in which we could do it. This meant that we kept our presentation short and snappy.
The second way we decided to answer the questions was by producing another Prezi presentaion. However, we didn't want to keep the theme the same so I decided to change it which may be a bit more engaging.
In this presentation we looked at distribution.
We included companies like The UK Council, Warner Bros and Sky Movies. This is because these are big companies who also distribute many Horror Films. This is because these companies distribute their films to a similar target audience as ours. Our Horror film wont be suitable for companies like Disney or Pixar. This is because they distribute cartoon films for young children and our certificate rating is for older people.
Videos
I then went on to create videos. I made this video to show our creativity. In this video i included what i have learnt by using new technologies. I decided to create a video and record on screen because it would be easier to explain what was new and how i used the tools to create our Horror film.
Firstly, to leearn something new I decided to use Final Cut Pro instead of iMovie. I wanted to learn new skills and explore the new software. I found out that Final Cut Pro had a lot more effects relating to horror than iMovie.
However, in some cases I did need help to use a few tools. It wasn't really hard to get use to. I found that Final Cut Pro made our film more realistic than we expected. In this video I show the tools I used, how I adjusted the sound to fit the film correctly and how I chose the right tools.
Our group decided to answer two questions by using GoAnimate. GoAnimate was a good way of answering the questions as it is creative and fascinating.
In this GoAnimate video we answered how we attracted our audience. From the Primary data we collected for our planning we build our Horror film around that. This is how we got o engage the audience be every aspect they wanted, i tried to include it in the media task.
Finally, we decided to answer the last question as an interview because we thought that it would be unique from the other ways we answered the questions. In this video we answered 3 things that was learnt since we did the preliminary task.
Since the Preliminary task, I have learnt how to use new a software and many editing techniques. Using Final Cut Pro was a bit hard at first, however, after dedicating many of my free lessons and lunchtimes, I had got the gist of how to edit. I had learnt how to crop and edit a sound, how to layer a clip and how to use suitable effects.
In this presentation, i had to discuss what media types our group used to relate to the real media products. I then i went on to answer a question asking who our audience would be.
It was a good idea to use Prezi because it is different from a normal presentation. The turns and swirls in this presentation makes it look attractive and interesting for our audience when they read through it. We didnt answer many of the questions because we wanted a variety of ways in which we could do it. This meant that we kept our presentation short and snappy.
The second way we decided to answer the questions was by producing another Prezi presentaion. However, we didn't want to keep the theme the same so I decided to change it which may be a bit more engaging.
In this presentation we looked at distribution.
We included companies like The UK Council, Warner Bros and Sky Movies. This is because these are big companies who also distribute many Horror Films. This is because these companies distribute their films to a similar target audience as ours. Our Horror film wont be suitable for companies like Disney or Pixar. This is because they distribute cartoon films for young children and our certificate rating is for older people.
Videos
I then went on to create videos. I made this video to show our creativity. In this video i included what i have learnt by using new technologies. I decided to create a video and record on screen because it would be easier to explain what was new and how i used the tools to create our Horror film.
Firstly, to leearn something new I decided to use Final Cut Pro instead of iMovie. I wanted to learn new skills and explore the new software. I found out that Final Cut Pro had a lot more effects relating to horror than iMovie.
However, in some cases I did need help to use a few tools. It wasn't really hard to get use to. I found that Final Cut Pro made our film more realistic than we expected. In this video I show the tools I used, how I adjusted the sound to fit the film correctly and how I chose the right tools.
Our group decided to answer two questions by using GoAnimate. GoAnimate was a good way of answering the questions as it is creative and fascinating.
In this GoAnimate video we answered how we attracted our audience. From the Primary data we collected for our planning we build our Horror film around that. This is how we got o engage the audience be every aspect they wanted, i tried to include it in the media task.
Finally, we decided to answer the last question as an interview because we thought that it would be unique from the other ways we answered the questions. In this video we answered 3 things that was learnt since we did the preliminary task.
Since the Preliminary task, I have learnt how to use new a software and many editing techniques. Using Final Cut Pro was a bit hard at first, however, after dedicating many of my free lessons and lunchtimes, I had got the gist of how to edit. I had learnt how to crop and edit a sound, how to layer a clip and how to use suitable effects.
Thursday, 13 March 2014
Filming
These pictures below show our group on action whilst at the location. I am not visible in these images as my part of this project was to edit.

This image is of our new concept. To make this more effective we decided as a group that Amy should be the actress. This way it will be more believable and the audience will be more effected. However, we had to crop these images because as you can see there are houses and vehicles in the background.

This image shows Yaaseen filming. I helped Yaaseen set up one of the cameras so we have the same footage from two different points. This was good because when i was editing i was able to switch to another perspective. This will also be effective towards the audience and it will allow the opening sequence to flow smoothly.
I was filming so that there are two different angles showing the same thing. I was also in charge of the editing and when i switch from one camera to the other, it would be effective and the continuity will still be there.

This image is of our new concept. To make this more effective we decided as a group that Amy should be the actress. This way it will be more believable and the audience will be more effected. However, we had to crop these images because as you can see there are houses and vehicles in the background.

This image shows Yaaseen filming. I helped Yaaseen set up one of the cameras so we have the same footage from two different points. This was good because when i was editing i was able to switch to another perspective. This will also be effective towards the audience and it will allow the opening sequence to flow smoothly.
I was filming so that there are two different angles showing the same thing. I was also in charge of the editing and when i switch from one camera to the other, it would be effective and the continuity will still be there.
Pre Filming Activities
This is the location before we shot the original video. Below i have added photos of members in the group and what their role was.

The Image above shows Amy filming me and Yaaseen. Whilst she was filming she had some difficulties keeping the camera safe. This is because she kept slipping on the mud. As you can see there is a lake in front of Amy. This was dangerous because amy could have fallen in the lake and the camera could have got damaged.

The image above is pretty blurry. However, in our first location we had to put the tripod on a slump on mud. For health and safety issues we had to move location. This is so that the cameras wouldn't get damaged and so that we would stop slipping all over the place.

This shot shows me and Yasseen walking. Another reason why we had to move location was because we had to walk down the steep muddy hill. This was dangerous, however, we took the risk. After two of our group members fell over we decided that this was no longer safe. We then had to search for another location and came across our new filming location. This was when we changed our whole concept and story.

The Image above shows Amy filming me and Yaaseen. Whilst she was filming she had some difficulties keeping the camera safe. This is because she kept slipping on the mud. As you can see there is a lake in front of Amy. This was dangerous because amy could have fallen in the lake and the camera could have got damaged.

The image above is pretty blurry. However, in our first location we had to put the tripod on a slump on mud. For health and safety issues we had to move location. This is so that the cameras wouldn't get damaged and so that we would stop slipping all over the place.

This shot shows me and Yasseen walking. Another reason why we had to move location was because we had to walk down the steep muddy hill. This was dangerous, however, we took the risk. After two of our group members fell over we decided that this was no longer safe. We then had to search for another location and came across our new filming location. This was when we changed our whole concept and story.
Monday, 10 March 2014
Health and Safety form
This document above was created by Yaaseen, one of the group members. in this form we had to think what was going to be a real issue and what we need to be aware of. Things like not feeding the animals that were around us was one of the things that was on the health and safety form. Due to bad weather we had to be careful in the woods because it was really slippery and we had to be careful because if we fell and hit our head on the logs then it wouldn't be safe for people to go.
Creating this Health and Safety form will be efficient because it will keep us alarmed on what to do and what not to do. Most of it was common sense but some of it was some things that we wouldn't have though of.
This document above was created by Yaaseen, one of the group members. in this form we had to think what was going to be a real issue and what we need to be aware of. Things like not feeding the animals that were around us was one of the things that was on the health and safety form. Due to bad weather we had to be careful in the woods because it was really slippery and we had to be careful because if we fell and hit our head on the logs then it wouldn't be safe for people to go.
Creating this Health and Safety form will be efficient because it will keep us alarmed on what to do and what not to do. Most of it was common sense but some of it was some things that we wouldn't have though of.
Friday, 7 March 2014
Research and Planning - Shotlist
The document below shows the shot list which was created by Amy. She had to change the shot list because whilst filming we decided that it would be more effective if Amy acted like she was lost and isolated. This meant that both the storyboard and shot had to be changed. It didn't take her long to create this because she had the footage so she just wrote up what saw.
The document above includes everything that was needed to film the Opening Sequence. When Amy was writing this she included how long it took to film each shot, what props we needed, what the shot type was and a summary of the scene.
Due to extremely bad weather we had to change our whole shot list, storyboard and synopsis. This meant that we had to re-write our whole Pre filming preparation. Whilst filming we had to make up our whole story whilst filming. Before we changed the concept we didn't refer to the shot list or storyboard much.
Overall, we found that it was much easier to film as we went along. This is because we didn't use the other preparation we made and the opening sequence turned out to be better when we changed it.
The document above includes everything that was needed to film the Opening Sequence. When Amy was writing this she included how long it took to film each shot, what props we needed, what the shot type was and a summary of the scene.
Due to extremely bad weather we had to change our whole shot list, storyboard and synopsis. This meant that we had to re-write our whole Pre filming preparation. Whilst filming we had to make up our whole story whilst filming. Before we changed the concept we didn't refer to the shot list or storyboard much.
Overall, we found that it was much easier to film as we went along. This is because we didn't use the other preparation we made and the opening sequence turned out to be better when we changed it.
Research and Planning - Storyboard
The storyboard below shows the new shot list we made. we had to change things around because we had changed the whole concept whilst we were filming. This is because we needed two people to operate on the camera. In order to do this me and Yaaseen had to film. This turned out to be more interesting for the audience to watch.
The image below shows the shots from 1 to 5.


This storyboard shows the shots from 6 to 10.
As you can see from the image below. I tried to draw everything as accurate as possible. The image below shows shot 10. This shot is of the actress (Amy) looking at a map for some direction. However, she isn't able to find her location and find a way out.
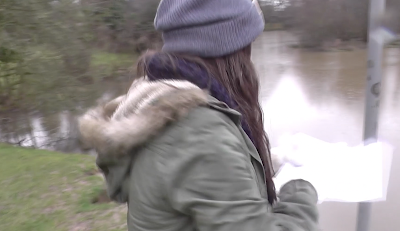
The scoreboard below shows the shots from 11 to 15.

The storyboard below shows the shots from 16 to 19.

The storyboard was drawn by me. I had to change the storyboard because the storyboard we made before was changed whilst we was sty location. I didn't have much time to draw this storyboard. Amy created the shot list and we completed the shot list and storyboard within 2 lessons. We tried to include Shot reverse Shot, The 180 degree rule and Match on Action. We could only include two of those because there was one character so we could use Shot reverse shot.
The image below shows the shots from 1 to 5.


This storyboard shows the shots from 6 to 10.
As you can see from the image below. I tried to draw everything as accurate as possible. The image below shows shot 10. This shot is of the actress (Amy) looking at a map for some direction. However, she isn't able to find her location and find a way out.

The scoreboard below shows the shots from 11 to 15.

The storyboard below shows the shots from 16 to 19.

The storyboard was drawn by me. I had to change the storyboard because the storyboard we made before was changed whilst we was sty location. I didn't have much time to draw this storyboard. Amy created the shot list and we completed the shot list and storyboard within 2 lessons. We tried to include Shot reverse Shot, The 180 degree rule and Match on Action. We could only include two of those because there was one character so we could use Shot reverse shot.
Thursday, 6 March 2014
Costume

The look we chose was a casual girl going through the woods for a walk. We tried to keep the look as basic because we didn't want to go over the top. As you can see from the list below, our actress was wearing very casual clothes. I have listed everything she was wearing and I have also provided extra information like the cost of the item and the website. This look also made the film look realistic and the survey we took said that the audiences liked things based on true stories.


Bentley Priory Location Shots
These locations relate to our Horror Sequence because once we've filmed here we will be able to add darker effects from Final Cut Pro. That will make it seem as if we filmed this at night. Once the soundtrack has been added, it will build tension and suspense to the audiences.

This location was going to be used for our horror film. This is because there isn't much and the Actress will have minimal choices to find a way out. There are also a lot of trees in this shot. The actress will also feel lonely and isolated because there isn't much to do or things to see. We couldn't choose this location as it was pretty far away from a lake and we didn't have enough time as the Horror Sequence Opening Title has to be a maximum of 2minutes.

After looking round Bentley Priory we had found this location which was also besides a lake. We had to film towards the lake because behind us there were people passing, houses and gates leading to the main road. To make Amy (the actress) look like she is isolated and has no route to escape.

We had to film like this to block off the houses in the background.The trees only blocked them in this direction. If we showed the houses it would have ruined the whole concept of the opening title sequence. The houses also would have made it looked like she had an escape route.

As you can see in this deleted scene, there are coaches and houses that can be seen. We had to delete this scene because it wouldn't have flowed with the rest of the recorded footage. If we were going to film towards the houses we had to use a high angle shot in order to cut out the houses, cars, maps and people walking past in the background.

This location was going to be used for our horror film. This is because there isn't much and the Actress will have minimal choices to find a way out. There are also a lot of trees in this shot. The actress will also feel lonely and isolated because there isn't much to do or things to see. We couldn't choose this location as it was pretty far away from a lake and we didn't have enough time as the Horror Sequence Opening Title has to be a maximum of 2minutes.

After looking round Bentley Priory we had found this location which was also besides a lake. We had to film towards the lake because behind us there were people passing, houses and gates leading to the main road. To make Amy (the actress) look like she is isolated and has no route to escape.

We had to film like this to block off the houses in the background.The trees only blocked them in this direction. If we showed the houses it would have ruined the whole concept of the opening title sequence. The houses also would have made it looked like she had an escape route.

As you can see in this deleted scene, there are coaches and houses that can be seen. We had to delete this scene because it wouldn't have flowed with the rest of the recorded footage. If we were going to film towards the houses we had to use a high angle shot in order to cut out the houses, cars, maps and people walking past in the background.
Sunday, 23 February 2014
Horror Opening Sequence Indents
The video below shows the first indent we created. this indent was really basic and needed to be improved. Yaaseen had added sound effects to make the clip more interesting and changed the smoke to fire. Our first Indent name was 'Heated Production'.
The video below shows our second indent we created. We decided to change the indent name from 'Heated Production' to ' Green Eyed Production' and added a few more effects to it so it is more interesting to watch.
Now that we had two indents we decided to widen our creativity and add both of them in. This was because after we added the 'Green Eyed Production' indent to our Horror Opening Sequence we had about 30 seconds left so we decided to add both in. Making these Indents were not a big hassle. They were pretty easy and quick to make.
We didn't spend much time on creating the indents because we wanted to spend more time on editing the opening sequence to make it as effective as possible. I mainly concentrated on the editing and tried to make everything so intense for the audience.
Our Indents are good but we could have spend more time adding effects and sound to it to make it look more interesting.
The video below shows our second indent we created. We decided to change the indent name from 'Heated Production' to ' Green Eyed Production' and added a few more effects to it so it is more interesting to watch.
Now that we had two indents we decided to widen our creativity and add both of them in. This was because after we added the 'Green Eyed Production' indent to our Horror Opening Sequence we had about 30 seconds left so we decided to add both in. Making these Indents were not a big hassle. They were pretty easy and quick to make.
We didn't spend much time on creating the indents because we wanted to spend more time on editing the opening sequence to make it as effective as possible. I mainly concentrated on the editing and tried to make everything so intense for the audience.
Our Indents are good but we could have spend more time adding effects and sound to it to make it look more interesting.
Tuesday, 28 January 2014
Indents
Indents are a shorter term for identification. film productions use them to identify their company.
I will be talking about how The 20th Century fox and Universal has changed over the years. Below I have attached a video from YouTube. The first one is an old indent and shows 20th Century Fox in the 1960's. as you can see it is pretty simple and not really eye-catching. In the second video i have embedded from YouTube. It shows the new/ modern version of the 20th Century Fox title sequence. As you may have noticed, it is much more colourful and eye-catching. The title sequence engages the audience and makes them want to watch the movie.
The 20th Century Fox
20th Century fox is one of the major american film production companies. This company was found in 1935 by William Fox. This company is one of the six major production companies. They have also made many successful films such as; Star Wars, Ice Age, X-Men, Die Hard, Planet of the Apes, Fantastic Four, Alien and Predator. They have also made many successful TV shows such as The Simpsons, Family Guy and Modern Family.
The video that i have embedded is the old indent for 20th Century Fox. As you can see this indent has no colour and is pretty plain. However, the theme tune is slightly the same.
The link above shows the new indent for 20th Century Fox. This one is more eye catching and has been made more modern for the audience. Furthermore, the 20th Century Fox logo is shown in a low angle shot surrounded by premier lights as it is a huge company who have made many films with blockbuster hits. On the other hand, the theme tune is a like a trademark. When the audience listen to the theme they will understand/ recognise the company straight away.
I will be talking about how The 20th Century fox and Universal has changed over the years. Below I have attached a video from YouTube. The first one is an old indent and shows 20th Century Fox in the 1960's. as you can see it is pretty simple and not really eye-catching. In the second video i have embedded from YouTube. It shows the new/ modern version of the 20th Century Fox title sequence. As you may have noticed, it is much more colourful and eye-catching. The title sequence engages the audience and makes them want to watch the movie.
The 20th Century Fox
20th Century fox is one of the major american film production companies. This company was found in 1935 by William Fox. This company is one of the six major production companies. They have also made many successful films such as; Star Wars, Ice Age, X-Men, Die Hard, Planet of the Apes, Fantastic Four, Alien and Predator. They have also made many successful TV shows such as The Simpsons, Family Guy and Modern Family.
The video that i have embedded is the old indent for 20th Century Fox. As you can see this indent has no colour and is pretty plain. However, the theme tune is slightly the same.
The link above shows the new indent for 20th Century Fox. This one is more eye catching and has been made more modern for the audience. Furthermore, the 20th Century Fox logo is shown in a low angle shot surrounded by premier lights as it is a huge company who have made many films with blockbuster hits. On the other hand, the theme tune is a like a trademark. When the audience listen to the theme they will understand/ recognise the company straight away.
Thursday, 16 January 2014
Film pitch
When we made our Synopsis to show what our title sequence story line will be. After we made the Synopsis, I created an account with Padlet. When i made this account, people were able to read our synopsis and posted a comment on the wall telling us what we did really well and what we could change to improve our story line and make it more effective. I have embedded our Padlet and the Synopsis.
Most of the people who commented on our Padlet told us that our story line was something that they liked, however, they also said how we can make certain aspects better and much more effective to the audience who are watching our opening title sequence. I think that the Padlet comments really helped us as our audience have told us what they would like to see. We don't want to spoil the sequence for the audience but we want to know what they would like to see to make it look more scarier.
Wednesday, 15 January 2014
Step Outline
The first post shows a step outline for Exorcist (1973) which was created by me. The second post shows the opening title sequence step outline for Sinister (2012). Our group chose these horror movies because they are similar to one another.
I have shown what the title sequence includes. I did this by sectioning the table. The table that I did shows what was included from sound to typography. my title opening was 01:38. Whilst doing this step outline i showed how each scene was effective and related to horror.
Another member in my group did a step outline for Sinister (2012). The opening sequence for this isn't that scary or frightening. However, the soundtrack and editing techniques makes the film much more interesting to watch.
When comparing these two opening title sequences, Exorcist (1973) is much more frighting than Sinister (2012). Whereas, the concept of both movies are similar. These two movies have given me an idea of how we should set our opening title sequence. In our opening title sequence we will include a scary soundtrack and try make our clips short so it keeps the audience interested. Our group will also use effective editing to keep the audience on the edge of their seats.
Monday, 16 December 2013
Horror Questionnaire
Click here to take survey
We did a questionnaire for our Horror opening sequence. This allowed our group to know what our audience like in horror movies. With this information our group can create a Horror title sequence that will be appealing to our target audience. In the video above we show the results from our questionnaire. The video will show who our main target audience are, what type of horror they like and what they like in horror scenes.
Our target audience are quite young. From our questionnaire most of the people who took it were between the ages from 17-30. This means that when we make our title sequence we will have to make it a 15 for legal reasons. Having a 15 certificate rating means that only people who are aged 15 and above are allowed to view our video. We will also try to make our video as entertaining as possible. This will be an important aspect of our video as we wouldn't want to bore our target audience.
Moreover, A lot of the people who took our questionnaire were females. This shows us that we need to make a video which is relevant to more females rather than males. Due to most females taking part in our questionnaire, it will be really pointless for us to include footage that will attract more male attention than females.
Furthermore, a lot of the people who took our questionnaire were from the UK, however, we had one anonymous result which came from the United Arab Emirates. Due to a lot of results coming from the UK we decided to make our video in English as we have a wider target audience. This will be better as more people will be able to understand what we are doing in our title sequence.
Most of the people who took our questionnaire are frightened by dark and confined spaces. Another favorite was supernatural occurrences. This will mean that we will include this in our video as it will be more engaging for the audience to watch. It will also leave them on the edge of their seats as these two features scare the audience the most.
When people answered our questionnaire, the favorite sub-genre was slasher. Another sub-genre they enjoyed was supernatural. This shows us that as a group we will have to include these as it will be most frightening for our audience. However, as a group we decided not to go with slasher as it will not work well with the other options they chose. We then decided to go for the second most popular sub-genre which was supernatural and we found that this aspect will work well with our video and will be most effective.
We then asked them what film they find really scary. We had a few results back which were repeated, films such as Drag Me To Hell and The Conjuring. With these popular Horror films, will try our hardest to make them similar and include some aspects from The Conjuring and Drag Me To Hell.
Finally, we asked our audience if they preferred a movie that was based on a true story or a fiction. Nearly all of our audience who took the questionnaire said that they prefer a true story based film. This meant that our group will have to do extra research in order to met the target audiences criteria.
Conclusion
From what we have gathered we have chosen to go with what the audience like to see in horror movies.We decided to go with what they wanted as our main target is to keep them engaged and make our clip as effective as possible. Even though we changed it a bit, from slasher to supernatural, we think that supernatural is still a popular option and will work best with our clip.
We did a questionnaire for our Horror opening sequence. This allowed our group to know what our audience like in horror movies. With this information our group can create a Horror title sequence that will be appealing to our target audience. In the video above we show the results from our questionnaire. The video will show who our main target audience are, what type of horror they like and what they like in horror scenes.
Our target audience are quite young. From our questionnaire most of the people who took it were between the ages from 17-30. This means that when we make our title sequence we will have to make it a 15 for legal reasons. Having a 15 certificate rating means that only people who are aged 15 and above are allowed to view our video. We will also try to make our video as entertaining as possible. This will be an important aspect of our video as we wouldn't want to bore our target audience.
Moreover, A lot of the people who took our questionnaire were females. This shows us that we need to make a video which is relevant to more females rather than males. Due to most females taking part in our questionnaire, it will be really pointless for us to include footage that will attract more male attention than females.
Furthermore, a lot of the people who took our questionnaire were from the UK, however, we had one anonymous result which came from the United Arab Emirates. Due to a lot of results coming from the UK we decided to make our video in English as we have a wider target audience. This will be better as more people will be able to understand what we are doing in our title sequence.
Most of the people who took our questionnaire are frightened by dark and confined spaces. Another favorite was supernatural occurrences. This will mean that we will include this in our video as it will be more engaging for the audience to watch. It will also leave them on the edge of their seats as these two features scare the audience the most.
When people answered our questionnaire, the favorite sub-genre was slasher. Another sub-genre they enjoyed was supernatural. This shows us that as a group we will have to include these as it will be most frightening for our audience. However, as a group we decided not to go with slasher as it will not work well with the other options they chose. We then decided to go for the second most popular sub-genre which was supernatural and we found that this aspect will work well with our video and will be most effective.
We then asked them what film they find really scary. We had a few results back which were repeated, films such as Drag Me To Hell and The Conjuring. With these popular Horror films, will try our hardest to make them similar and include some aspects from The Conjuring and Drag Me To Hell.
Finally, we asked our audience if they preferred a movie that was based on a true story or a fiction. Nearly all of our audience who took the questionnaire said that they prefer a true story based film. This meant that our group will have to do extra research in order to met the target audiences criteria.
Conclusion
From what we have gathered we have chosen to go with what the audience like to see in horror movies.We decided to go with what they wanted as our main target is to keep them engaged and make our clip as effective as possible. Even though we changed it a bit, from slasher to supernatural, we think that supernatural is still a popular option and will work best with our clip.
Friday, 6 December 2013
Horror Research
In this task we had different research tasks to complete. Our group had shared the tasks evenly and all did different types of horror research. The research tasks included Iconography of horror, a timeline that shows the history of the genre and how it has changed over time. The certificate ratings shows us what we can include for certain ages. This will be helpful as we can only add a limit amount of blood and gore. Our last research was to look at the sub genres.
By doing this, It will help us to find the best target audience and what to include in our Horror sequence when we come to make it. This research will also show us how to make a sequence that is suitable for a certain age group and appeal to our target audiences. Our research will help us to know what to include and what will attract the audiences attention
I started with the certificate ratings. this allowed us to know what we was allowed to include for certain age groups. It also showed us what the audience may want to see and showed us our limits to make a horror title sequence.
Amy then went on to producing the timeline. This showed our group how our certain target audience have changed throughout the years and what they now find appealing.
Yaaseen then went on to making the Iconography of horror. This research was very helpful as it would show us what props and costumes we will need to include for our sequence. It also showed us how effective each prop can be and what effect it has on the audience.
Finally, Yaaseen also did the sub genres of horror. This will help us as a group as our questionnaire will let us know which one is more popular and we will then base our horror on the most popular sub genre. This will be good as it will be what our audience wants and what they prefer.
Monday, 2 December 2013
Evaluation Preliminary Task
This video shows our group discuss the key points and media conventions we used. In this video we also talked about how we used Match on Action, The 180 Degree Rule and Shot Reverse Shot. We also talked about how we could improve our Preliminary task. At the end of the video we all took the chance to tell the audience what we learnt individually whilst creating the Preliminary Task video. Whilst creating this Evaluation video we decided to be creative and produce an evaluation in a fun way. We thought that it would be amusing and unique to do our evaluation this way.
Preliminary Task
In this preliminary task my group decided to film someone walking down a corridor and walking into a classroom. We then decided that the two students will discuss some science work they are currently working on. Moreover, we decided to film it in school as it would be relevant to our preliminary task video.
The preliminary task shows Jawaad (me) walking down a corridor from many different angles. The different angles allowed us to show that we can keep the video flowing without any struggle. The different angles prevents the audience from getting bored. Another reason we did different angles is to show that we can use Match on Action effectively. Whilst filming we included close ups, when opening the classroom door, a long shot, when walking in and a high angle, when walking down the corridor.
After I've entered the classroom we did include the 180 degree rule and shot reverse shot. This makes it clear to the audience the situation and makes the video easier to understand as there is minimum dialogue.
In regarding to Mise en Scene our chosen location was a school. This made our preliminary task much more understandable and realistic. The actors in this task didn't wear uniform, however, we tried to show college students learning and i think that we accomplished our target.
The equipment we use wasn't complicated and was very simple and basic. We used our filming skills to make our shots effective to the audience/ viewers. Our cameraman and camerawoman, Yaaseen and Amy, they used two tripods and two cameras. They also used a microphone to discard any background noises.
Monday, 7 October 2013
Match on Action
Match on Action is when two cameras have been set in different angles and record the same scene. This allows the audience to believe that the scene is continuos and flows nicely. Then when editing you cut one shot to another to show continuity.
In my group we had to film someone coming/ walking up the stairs. In our activity we had chosen a female to act as if she has grabbed something from her locker and heading off to her next lesson. Moreover, when we filmed this we tried to get as many angles as possible. We did this so that our viewers/ audience wouldn't get bored. Whilst filming we positioned the camera at the bottom of the stairs, middle and the top. This gave us a lot of ideas when putting this scene together. Our group also chose to use a range of camera angles such as Low angle and High angle shots.
Moreover, I believe that the simplest thing of the activity was filming. However, I believe that the editing was easy for me. This is probably because we had a lot of footage to put in. Furthermore, the girl didn't have a complex task so her acting wasn't that hard either. We believe that she didn't have any trouble acting as it is an everyday situation.
Furthermore, I believe that the most difficult thing in this activity was try not to get any other of the group members in. This would make the scene look very basic and not professional. It was also quite hard to try not to get any of the other cameras in. this would have ruined the scene. To prevent this from happening we did a practise run first. this allowed us to see if there was anything in the way.
From doing the task with my group, I now understand Match on Action and how it can be used in a scene to see things from different perspectives and how it shows continuity in a clip. this keeps the audience engaged and not bored. I have learnt a new filming technique that will improve my work in the future.
if I did this activity again I would make sure that it is continuous. For example, when the actress is walking up the flight of stairs with a phone in her hand. Once she goes up the stairs we film her and she doesn't have a phone. This would be one thing i change if i did this activity again. Even though Im skilled when it comes to editing, I believe that i can improve the clip by spending more time on it instead of rushing it.
Tuesday, 1 October 2013
AS Media Shot reverse shot and 180 degree rule activity
The 180 degree rule is a guideline of filming of a relationship between two characters or an object within the scene. The camera is filmed along the imaginary line called the axis. This connects the characters by keeping them on one side of the axis for every shot in the scene. Moreover, character B is always framed left to character A. This helps maintain continuity for the audience/ target audience.
Shot Reverse Shot is a film technique where one character is looking at another character, who is off screen. Then the other character is then shown looking back at the first character. Furthermore, the characters are shown facing in opposite directions. This makes the audience believe that they're having a conversation and looking at each other. However, you have to make sure that their eye lines match.
We were in a group of four. In the activity I played a guy who bumps into his friend. Our group decided that our scene would be based on a conversation between two mates who haven't seen each other in a long time. Moreover, In the scene we included both Shot Reverse Shot and The 180 Degree Rule. This showed the audience that there's a conversation taking place.
On the other hand, in our Peer Assessment we had positive feedback, however, we didn't clearly show our eye lines matching. They also said that our tracking and panning should have been less shaky and more smooth. Our positive feedback was that we did our editing well and we obeyed the 180 degree rule. The also said that this allowed our conversation to flow.
Furthermore, we did take on board use of camera, framing and Mise en scene. However, we had been marked down on our camera because at the end of the scene our camera was very shaky. We also lost a few marks because when my group filmed me i was a close up and when they filmed Yaaseen (other character) it was a mid shot. On the other hand, we did take Mise en Scene into consideration because there wasn't anyone who walked through our scene and interrupted our filming. One thing we needed to do was to match our eye lines. this would have given us bonus marks and would have boosted up our grade.
When filming our group payed attention to the use of camera, framing and mise en scene. They did this by making sure that we were in a location where people wouldn't disturb our filming and make it look unprofessional. this awareness was successfully met. In the activity, I had a part to be a friend meeting another friend and having a small conversation with him. As an actor I had to make sure that I was serious and wasn't laughing when filming. In terms of framing I made sure that nothing was in the way of our filming that would make our clip look bad. Even though I was an actor when it came to editing I made sure that i cropped out any unnecessary things that were in the way. This was one way I had control of what was going on in the frame. This is because me and Yaaseen were actors and didn't have control of the camera.
Moreover, If we were to do it again I would like to have a part in the camera and let Amy and Fatima do some acting. iMovie was very helpful because we could edit out all the mistakes we made and let us make the clip more continuous so the audience don't get bored. Our main target was to keep the clip ongoing and continuous and I believe I accomplished this. This is because when editing i made sure that there wasn't any pauses or jumps. Overall, I believe i did an important part to make sure that the conversation flows.
I believe that I demonstrated Shot Reverse Shot and the 180 degree rule very effectively. this is because when filming we used a tripod to make sure that the camera were specifically directed at both characters. When filing it would have been impossible to disobey the 180 degree rule because we had a massive grey metal object in our way. However, there were a few drawbacks. When I looked back at the footage, even though our group used a tripod, it was hard to keep the camera steady and move at the same time.
If I had the opportunity to do this task again I would correct all of the drawback me and my group faced. Firstly, I would use a tripod that will still keep the camera steady when moving around. Furthermore, I will also make sure the gap between both characters are even. This can be done by marking a spot on the ground for them and then making them stand on the spot so that in they move the gap will still stay identical. Moreover, if I was to film again I would make sure that our camera will be in a suitable position so that we don't show shot reverse shot. I think that there wasn't that much problem with our Mise en Scene, but if I was to do this activity again I would make it obvious to the audience that we are in school.
Overall, for a first attempt I think that I did really well and learnt a lot whilst doing the Shot Reverse Shot and The 180 Degree Rule. I also believe that what I edited made such a big difference to the clip. This is because the small things that went wrong were corrected and made a huge difference to the final clip.
We have demonstrated how to use different camera angles by planning it on a storyboard and then going out as a group and taking pictures of a certain genre. The most challenging thing about this activity was to find the best setting which was hard because we had to do a shot of someone killing another. Moreover, we could have done these shots at night because it would have made the images look better and realistic. The simplest thing was taking the shots. This was because our group already planned it out. Furthermore, this made it easy for us as we had a good knowledge on what to do. I have learnt how to take many camera shots like High Angle, Low Angle and Mid shot. I am now comfortable on using a camera when taking these shots.
The most easiest part of the activity was to pick out the different types of shots we were going to use. This was easy because there are so many shots and angles to choose from. However, we chose the best shots that would make our shots very effective to the audience. This was a good thing because we discussed it as a group and put all of our ideas together.
From doing this activity, I was able to define and recognise a lot of new camera shots and angles. I also learnt how to use them very effectively and how it can make a storyboard more interesting. In the future i will be able to use the new camera shots and angles to make my work look more interesting than taking simple shots.
When we actually got down to filming/ taking the shots, we had to concentrate more on our body language, facial expression and our acting skills. This would have created suspense and tension as the audience will be drawn into our storyboard as these are the factors we want them to feel. It was pretty obvious to show that we were in school and our mise en scene gave this away. However, we could have made this more effective if we were able to shoot this activity at night. I believe that our setting would have made the clip more effective if we were to film somewhere dark as there's a serial killer involved. The school setting and daylight
ruins our story.
Finally, we made a relevant storyboard whilst using a variety of camera shots and angles. We did this to create an atmosphere and suspense. If we was to do this again I was change the setting and make it more effective to the audience.
The most easiest part of the activity was to pick out the different types of shots we were going to use. This was easy because there are so many shots and angles to choose from. However, we chose the best shots that would make our shots very effective to the audience. This was a good thing because we discussed it as a group and put all of our ideas together.
From doing this activity, I was able to define and recognise a lot of new camera shots and angles. I also learnt how to use them very effectively and how it can make a storyboard more interesting. In the future i will be able to use the new camera shots and angles to make my work look more interesting than taking simple shots.
When we actually got down to filming/ taking the shots, we had to concentrate more on our body language, facial expression and our acting skills. This would have created suspense and tension as the audience will be drawn into our storyboard as these are the factors we want them to feel. It was pretty obvious to show that we were in school and our mise en scene gave this away. However, we could have made this more effective if we were able to shoot this activity at night. I believe that our setting would have made the clip more effective if we were to film somewhere dark as there's a serial killer involved. The school setting and daylight
ruins our story.
Finally, we made a relevant storyboard whilst using a variety of camera shots and angles. We did this to create an atmosphere and suspense. If we was to do this again I was change the setting and make it more effective to the audience.
Subscribe to:
Posts (Atom)